
Whether you’re creating YouTube Shorts, Instagram reels, TikTok skits, or editing work projects, various scenarios may require you to clip a video. Video clipping is an excellent way to spotlight the most important parts of the video and create montages and trailers for marketing and social media campaigns.
If you are searching for a way to do that, don’t miss this guide! Here, I will help you master how to clip your own videos from scratch. Dive in for key features and step-by-step instructions for the best video clip generators.
Method 1. Create Short Clips from Long Videos with AI [HOT]
I love do-it-all editing solutions like Media.io Auto Clip. Being an advanced AI video clip generator, Media.io Auto Clip facilitates the swift conversion of long videos into intriguing short clips without human intervention.
Not only is this a solid free AI video clip generator, but it also provides other features like intro and title auto-generation, re-editing, and one-click YouTube sharing. Best of all, it’s an online tool that supports all devices, so you can edit your videos without the hassles of downloading and running an offline app.
Other top features of this AI video clipping tool are:
- Compatible with multiple upload formats: Media.io Auto Clip supports numerous file formats, such as MP4, WEBM, AVI, MOV, MKV, FLV, and WMV.
- Compatible with large uploads: You can quickly upload up to 2GB videos ranging between 0.5 to 30 minutes.
- Link-pasting supported: In addition to uploads, this auto video clip maker allows you to import videos for editing by pasting links from TikTok, YouTube, Instagram, etc.
- Dedicated video editor: After clipping, you can also use its video editor to add subtitles, trim files, apply cool effects, animate, change backgrounds, and more.
- Auto-clip video in seconds: This tool allows up to 10 times faster clipping, ensuring you spend less time editing.
Like what you hear? Let’s check the steps to create a video clip with AI using Media.io Auto Clip:
STEP 1. Open the Media.io auto-clipping tool on your browser and import a video by clicking “Upload Video File” or pasting its online link.

STEP 2. Customize the parameters for the video, including AI settings and preferred clip length. You can also add keywords to be highlighted in the clips. Afterward, click “Generate in one click”.
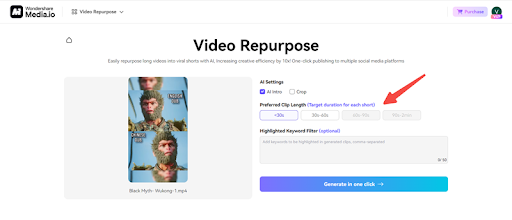
STEP 3. Now, you can preview the generated clips and click “Download” to save them locally. You can also share them on YouTube. If you want to edit the clips, just click the “Edit” button.

Method 2. Turn Long Video into Clips with iMovie
If you’d like a dedicated app for your iPhone, iPad, Apple Vizion Pro, or Mac, iMovie offers a fast, reliable method to convert long video to short video. This tool is a powerful, nonlinear editor that’s best for beginner-level editing.
However, it only supports Apple devices and has low editing efficiency, but there isn’t much to complain about as it comes free.
To create short clips from long videos with iMovie, you can take the following steps:
STEP 1. Launch the app and click “Create New” > “Movie.”

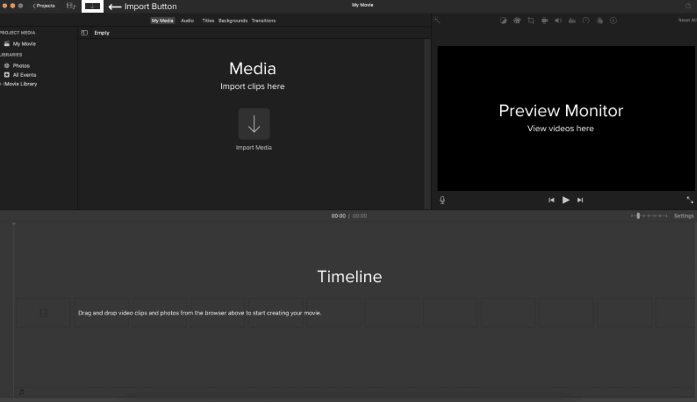
STEP 2. Click the “Import Media” icon (downward-facing arrow) to upload the video you want to clip. Afterward, select files and click “Import Selected.”
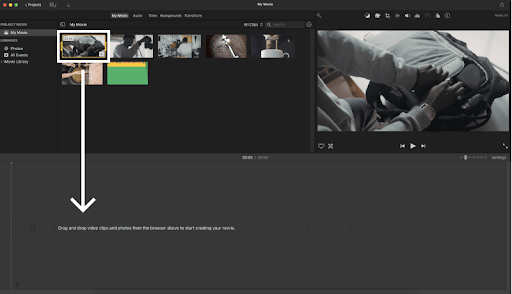
STEP 3. Tap and drag the video you want to edit onto the timeline.
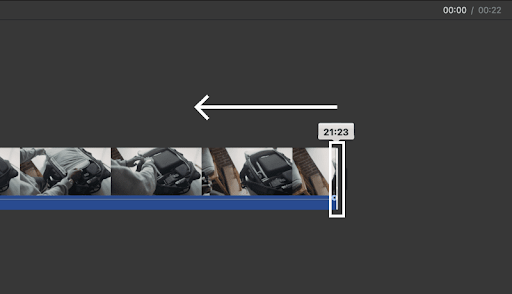
STEP 4. Click and drag the video’s edges to trim it as desired.
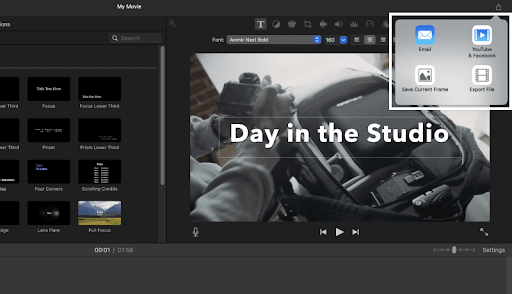
STEP 5. Once satisfied, click the export icon (the upward-pointing arrow at the top right). Choose a suitable export option and follow the prompts.
Method 3. Clip Your Own Videos with Premiere Pro
If you need to clip videos on Windows, Premiere Pro may be a suitable choice. I love this tool’s versatility, as it also allows video clipping on MacOS. Premiere Pro offers numerous editing functions, such as cropping, trimming, and adding video/audio effects.
However, its steep learning curve and pricey subscription fee make it not ideal for beginners. Moreover, it features high hardware and software requirements: 8GB RAM, 2GB GPU (98GB for Apple Silicon), 1920 x 1080 displays, and 1 Gigabit Ethernet. Windows users need at least 64-bit version 10 V22H2, while Mac users must have at least Monterey (version 12).
Nevertheless, it’s still a professional-level video editing tool with many features besides clipping.
Premiere Pro offers two methods for clipping videos: the razor tool and the Current-Time Indicator. Here’s how to use both:
Clip Videos with Premiere Pro Razor Tool
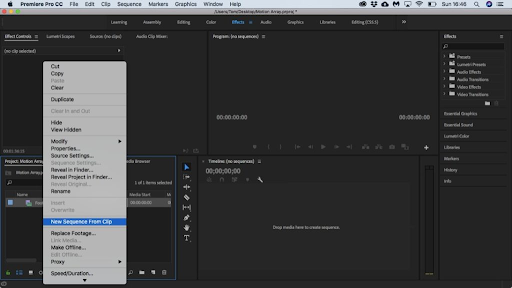
STEP 1. Install Premiere Pro and launch it. Go to “File” > “Import” or press Ctrl+I/Cmd+I to upload the video you want to edit. Afterward, right-click and tap “New Sequence From Clip” to see the video as a single block. If you already have a sequence, drag the video onto the timeline.
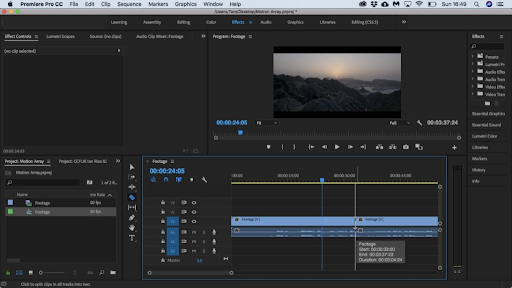
STEP 2. Head to the menu next to the timeline and click the razor icon. Next, click the section of the video you want to split, and you’ll get two clips.
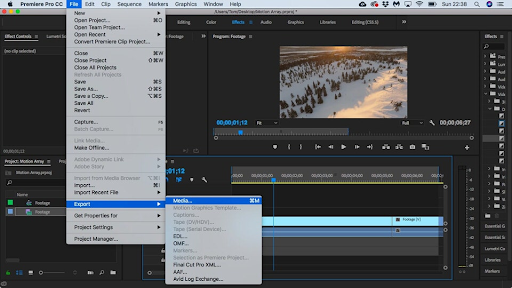
STEP 3. Head to “File” > “Export” > “Media” to export the video clips.
Clip Videos With the Premiere Pro Current-Time Indicator
STEP 1. Import the video you want to split into the editing tool and drag it to the timeline using the steps discussed above.
STEP 2. Drag the Current-Time Indicator to the place you want to split your video. Ensure the highlight covers both the video and audio to avoid splitting the video while leaving the accompanying audio untouched.
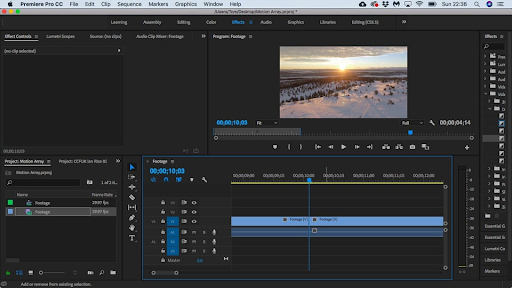
STEP 3. Split the video by pressing Cmd+K/Ctrl+K on your keyboard and export it once satisfied.

Final Words
Learning how to clip a video is an excellent way to start your editing journey and save the best parts for your social media and marketing campaigns. In this article, three different tools have been introduced to help you clip your own videos. Among them all, Media.io Auto Clip is considered the best video clipping tool. It allows quick uploads in numerous video formats and automatically clips your video to highlight the most exciting aspects. So why not give it a try?


